Windows 11 comes packed with tools and services that cater to a wide range of users, from casual home users to IT professionals. But not every feature is essential for everyone. Microsoft makes many of these tools available as optional features, components you can install, remove, enable, or disable depending on your needs.
Whether you want to set up Hyper-V for virtualization, use Windows Subsystem for Linux, or remove older tools you no longer use, managing optional features helps you keep your system efficient and personalized. This guide walks you through everything you need to know about finding, installing, and removing optional features in Windows 11 using the Settings app, Control Panel, and Terminal.
What Are Optional Features in Windows 11?

(Image Source: Microsoft)
Optional Features in Windows 11 are built-in Windows components that are not installed by default. They include both legacy and advanced tools, designed to enhance productivity, compatibility, or system functionality. Some examples include:
- .NET Framework 3.5 and 4.8 – Needed for certain older applications
- Hyper-V – Enables virtualization
- Windows Subsystem for Linux (WSL) – Allows you to run Linux commands on Windows
- Microsoft Print to PDF – Virtual printer to save files as PDFs
- RSAT Tools – For remote server management
- Windows Hello Face – For biometric sign-in
These features are optional because not every user needs them. For example, a developer might need WSL or Hyper-V, while a regular user might prefer to disable them to save disk space or simplify their system.
Finding and Installing Optional Features in Windows 11
You can access optional features in two main places:
1. Through the Settings App
The easiest way to manage optional features is through the Settings app, which offers a user-friendly interface. It provides clear descriptions and installation progress indicators. To access Optional Features:
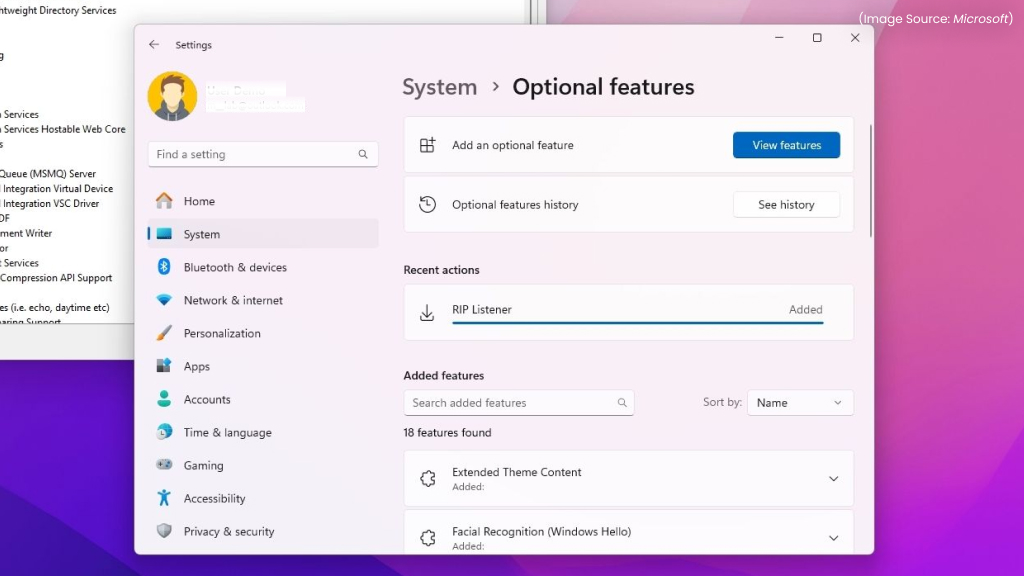
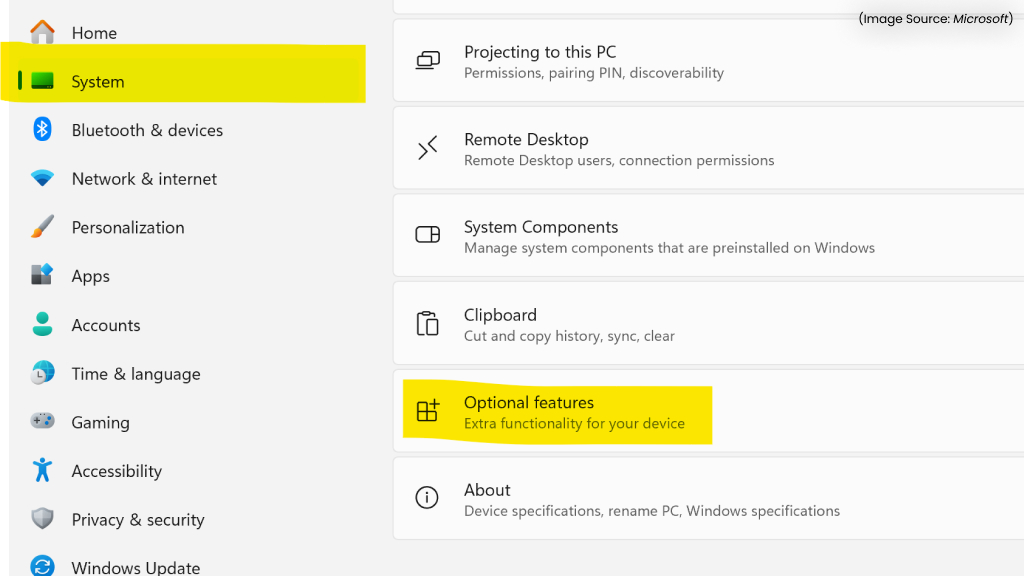
- Open Settings, and select System from the left-hand menu, and then choose Optional Features on the right.
- Click View Features to access a menu that displays your currently installed features along with the option to add new ones.
- In the search bar, type the feature name (e.g., RSAT, XPS Viewer, Wireless Display).
- Select the checkbox beside the feature you want to install.
- Click Next, and then Install.
Windows will begin downloading and installing the feature. Once completed, you might to restart your PC for changes to take effect.
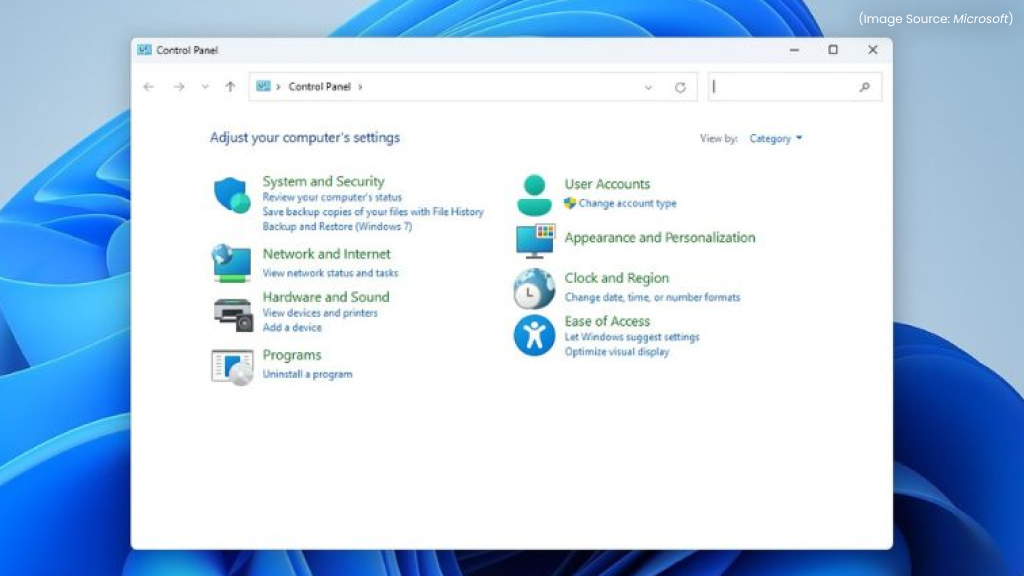
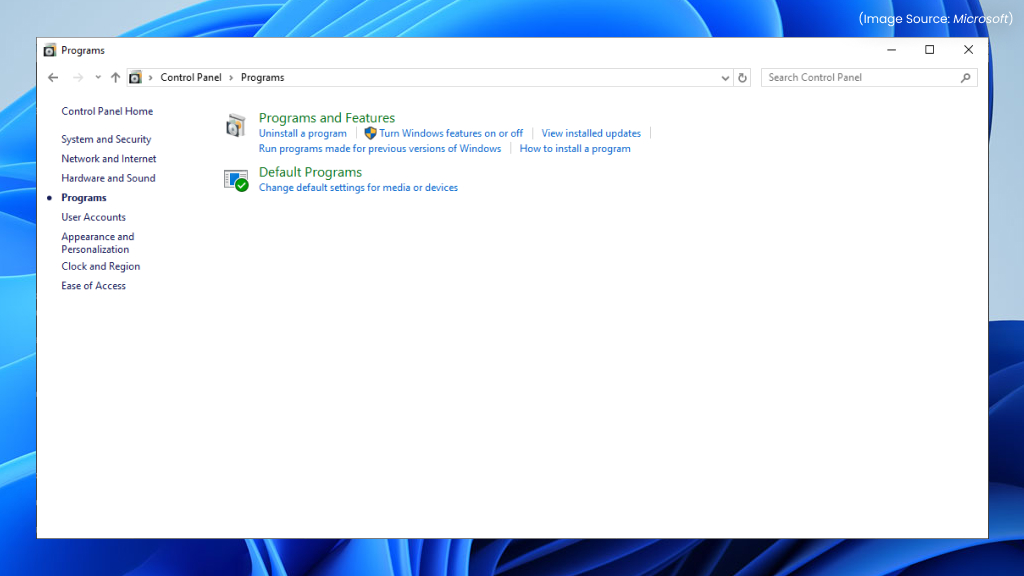
2. Through the Control Panel
Some older or system-level features are still managed through the Control Panel under Windows Features. To access them open the Control Panel and navigate to Programs, and then Programs and Features. This section displays a list of all installed programs and Windows features, allowing you to uninstall, modify, or repair them as needed.
You can also access a more focused view directly through the Start menu by typing Turn Windows features on or off in the search bar. Selecting this option opens the Windows Features window, a classic Control Panel tool that lists only system features, similar to what you’d find on a Windows 10 PC.
How to Remove Optional Features Using the Settings App
Removing unused features can free up system resources or reduce potential security risks. To uninstall optional features:
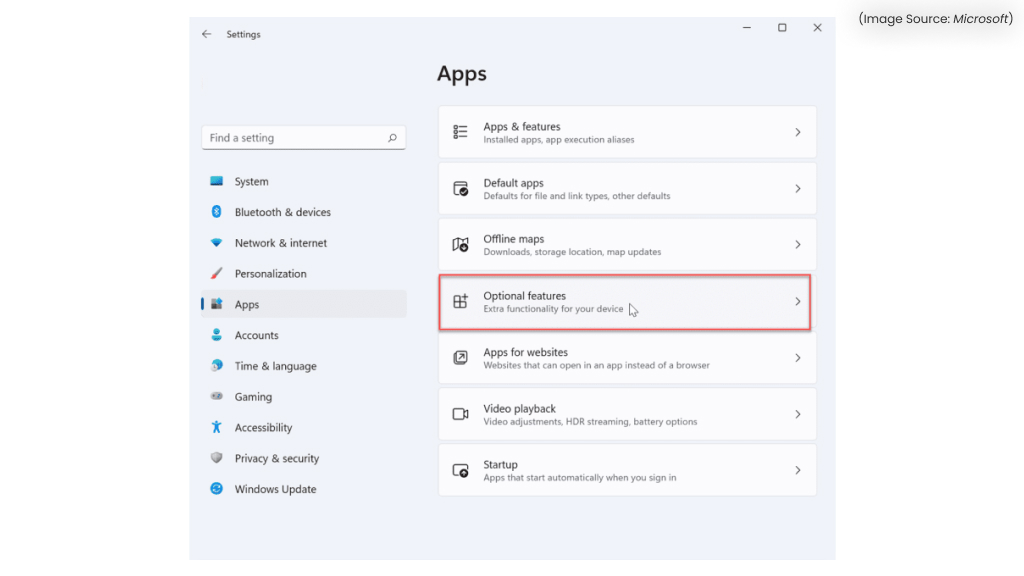
- Open Settings – Apps – Optional features.
- Scroll down to the Installed features section.
- Locate the feature you want to remove (e.g., Internet Explorer Mode or WordPad).
- Click on it and select Uninstall.
Windows will remove the feature automatically. A restart may be required for some system-level components.
How to Turn Windows Features On or Off Using Control Panel
The Control Panel method is ideal for enabling or disabling system-level features. Steps to turn features on or off:
- Open Control Panel – Programs and Features.
- Click Turn Windows features on or off on the left side.
- You’ll see a list of features with checkboxes; for example, a checked box means the feature is enabled, an empty box means it’s disabled, and a shaded box indicates partial installation.
- To Turn Off a feature, uncheck the box.
- Click OK, then Restart your PC if prompted.
For example, you can enable Hyper-V by checking its box, or disable by unchecking it.
How to Enable or Disable Optional Features Using Windows Terminal
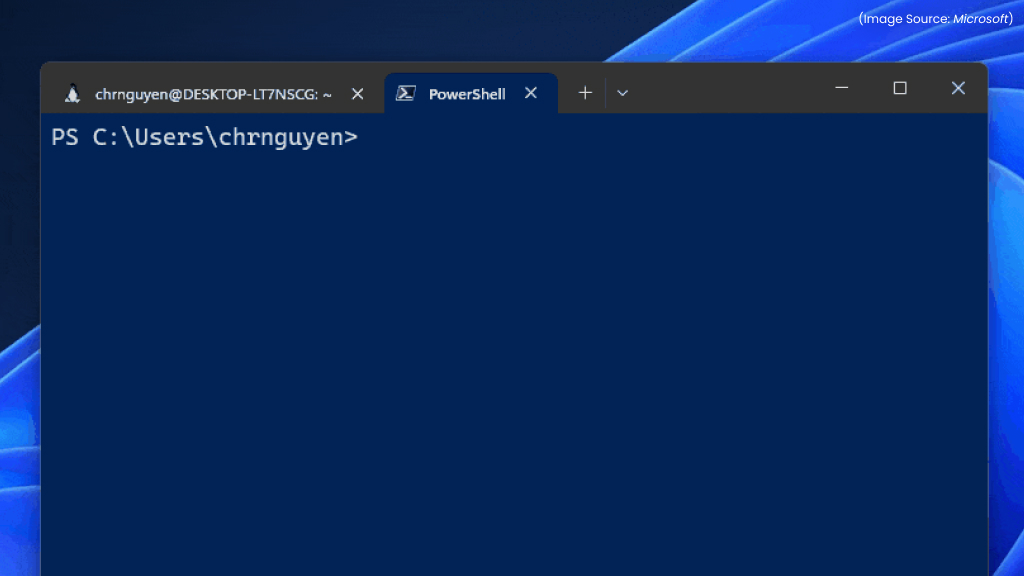
For advanced users or system administrators, the Windows Terminal (PowerShell) provides powerful control over optional features. This method is especially useful for automation or batch setups.
- To Open Windows Terminal as Administrator, Right-click on the Start menu and choose Windows Terminal (Admin).
- To View All Available Optional Features run: Get-WindowsOptionalFeature -Online. This will display all available features along with their current status (Enabled/Disabled).
- To Enable an Optional Feature use the command: Enable-WindowsOptionalFeature -FeatureName [ ] -Online.
- To Disable an Optional Feature use the command: Disable-WindowsOptionalFeature -FeatureName [ ] -Online.
Why Manage Optional Features?
Managing optional features gives you greater control over system performance, security, and customization. Here’s why it matters:
- Improved performance: Disabling unused components reduces background processes.
- Security: Removing outdated features minimizes potential vulnerabilities.
- Customization: You can tailor Windows 11 for productivity, gaming, or development needs.
- Storage savings: Some features consume significant disk space—removing them can free up gigabytes.
Best Practices for Managing Optional Features
When managing optional features in Windows 11, it’s important to strike a balance between performance, functionality, and stability. Always review what each feature does before enabling or disabling it, as some components depend on others to function correctly. Keep essential features like the .NET Framework or Windows Update Services active to avoid app compatibility issues.
Use an administrator account to make changes, and restart your system when prompted to apply updates properly. Before making major adjustments, create a system restore point to safeguard your data and settings in case you need to revert any changes later.
Managing optional features in Windows 11 is a simple yet powerful way to tailor your PC to your exact needs. Whether you’re adding developer tools like Hyper-V, enabling Windows Subsystem for Linux, or removing older components to improve performance, these controls give you flexibility and efficiency.
Using the Settings app is ideal for everyday users, while the Control Panel and Terminal offer deeper customization for power users. By understanding how to install, remove, enable, or disable these features, you can optimize Windows 11 for better speed, security, and productivity, ensuring your system works exactly the way you want it to.